
A How to Supercharge Guide for Audio Data Labeling That Actually Works!
Jul 19, 2024
Welcome back, audio enthusiasts and AI aficionados! Whether you’re a regular reader or joining us for the first time, it’s a pleasure to have you on board for this week’s in-depth look at speech recognition. Every week, we explore a different facet of audio technology, and today, we’re tackling a topic that’s close to my heart: audio data labelling.
If you’ve ever wondered why your voice assistant seems to have selective hearing, or if you’re looking to elevate your own speech recognition models from “meh” to “magnificent,” you’re in for a treat. So grab your favourite noise-cancelling headphones, settle in, and let’s unpack the art and science of audio data labelling that works. Trust me, by the time we’re done, you’ll be itching to overhaul your labelling workflow and watch your speech recognition accuracy soar.
Have you ever tried to get Siri or Alexa to understand you, only to have them completely miss the mark? I feel your pain. As someone who’s spent years working with speech recognition technology, I know firsthand how frustrating it can be when these systems fall short. But here’s the thing—the key to better speech recognition often lies in the quality of data used to train the models. That’s where audio data labelling comes in.
I’m going to walk you through setting up an audio data labelling workflow that will transform your speech recognition models from “Sorry, I didn’t catch that” to “Got it, here’s what you asked for.” We’ll cover everything from selecting the right tools to training your team, and I’ll share some hard-won insights from my experiences in the trenches.
Why Audio Data Labeling Matters
Before jumping in, let’s talk briefly about why this matters. High-quality labelled audio data is the foundation of any suitable speech recognition model. It’s like trying to learn a new language—the more accurate examples you have, the better you’ll become. Poor-quality data leads to models that struggle with accents, background noise, or specialized vocabulary.
A great friend of mine was involved in a project where they initially used hastily labelled data. The result? A model that could barely understand basic commands, let alone handle complex queries. It was a wake-up call that led is startup to overhaul their labelling process completely.
Setting Up Your Workflow
1. Define Your Objectives
First things first: You need to know what you’re aiming for. This step is crucial and often underestimated. I’ve seen projects go off the rails simply because the team needed a more precise, shared understanding of their objectives from the outset.
Start by asking yourself these key questions:
What’s the specific domain of your speech recognition project?
Who are your end users?
What languages or dialects do you need to cover?
What types of audio environments will your model need to handle?
Are there any particular challenges unique to your use case?
Let’s break these down with some real-world examples:
Domain Specificity: If you’re working on medical transcription, you must focus on accurately capturing complex medical terminology, drug names, and anatomical terms. On the other hand, a customer service voice bot might need to prioritize understanding common inquiries, emotional tones, and product names.
I once worked with a project for a legal tech startup. We had to train our model to recognize legal jargon, case citations, and Latin phrases commonly used in law. This required us to build a specialized lexicon and train our labellers in legal terminology.
User Demographics: Consider who will be using your speech recognition system. Are they primarily elderly users? Children? Non-native speakers? Each group presents unique challenges.
For a project aimed at assisting elderly users with home automation, we had to account for slower speech patterns, potential speech impairments, and a tendency towards more formal language compared to younger users.
Language and Dialect Coverage: If you’re building a global product, you might need to handle multiple languages or dialects. Even within a single language, regional accents can significantly impact recognition accuracy.
A project I keep coming back to through this series of blogs that I worked with, that being the international call center, we had to deal with English spoken with Indian, Filipino, and South African accents. We created separate training datasets for each major accent group to improve our model’s versatility.
Audio Environments: The environment in which your system will be used can significantly affect its performance. Will it be used in quiet offices, noisy streets, moving vehicles, and so on?
2. Choose the Right Tools
Selecting the right audio labelling tool can make or break your workflow. You’ll want something that’s user-friendly but also powerful enough to handle your specific needs.
Some popular options include:
– Audacity: Great for basic audio editing and annotation
– Praat: Ideal for detailed phonetic analysis
– ELAN: Excellent for multi-layer annotations
I’ve found that a combination of tools often works best. We use Audacity for initial trimming and cleaning, then move to ELAN for detailed labelling. This allows me to leverage the strengths of each tool.
3. Prepare Your Data
Before you start labelling, you need to ensure your audio data is in good shape. This involves:
– Cleaning up background noise
– Trimming silence from the beginning and end of clips
– Normalizing volume levels
Take advantage of this step. I once had a team member who rushed through data preparation, and we ended up with inconsistent volume levels that threw off our entire labelling process. We had to go back and redo hours of work.
4. Develop Clear Guidelines
Consistency is key in audio labelling. Develop a comprehensive style guide that covers:
– How to handle overlapping speech
– Marking non-speech sounds (like laughter or coughing)
– Dealing with mispronunciations or accents
– Labeling confidence levels
Make sure everyone on your team has access to and understands these guidelines thoroughly. We hold regular training sessions to review the policies and discuss any ambiguous cases we’ve encountered.
5. Build Your Team
The people helping you with the labelling are crucial to your success. Look for individuals who:
– Have excellent hearing and attention to detail
– Are familiar with the domain you’re working in
– Can commit to consistent work hours
We’ve had great success partnering with linguistics students for our projects. They bring a deep understanding of language structure that’s incredibly valuable in audio labelling.
6. Implement Quality Control
Even with the best team and guidelines, errors can slip through. Set up a robust quality control process:
– Have multiple people label the same audio and compare results
– Regularly review a sample of labelled data
– Use automated checks to catch apparent errors
We use a two-tier system: Two people label every piece of audio, and a third reviews any discrepancies. It’s time-consuming, but the quality improvement is worth it.
7. Iterate and Improve
Your workflow shouldn’t be set in stone. There’s always room for improvement, and the rewarding feeling of seeing your speech recognition models improve is just around the corner. Continuously gather feedback from your team and look for ways to improve efficiency and accuracy.
For example, we noticed our team needed help with certain technical terms in a project for a software company. We created a custom dictionary tool that allowed labellers to quickly look up and insert these terms, significantly speeding up the process.
Tips for Streamlining Your Workflow
Now that we’ve covered the basics, here are some additional tips to help you hit the ground running:
1. Start Small: Begin with a pilot project to test your workflow before scaling up. This allows you to identify and fix issues early on.
2. Use Keyboard Shortcuts: Teach your team to use keyboard shortcuts in your labelling tools. This small change can lead to significant time savings.
3. Implement Regular Breaks: Audio labelling requires intense focus. Schedule regular breaks to prevent fatigue and maintain accuracy.
4. Create a Feedback Loop: Set up a system for labellers to easily report issues or suggest improvements. Team member suggestions have led to some of our best workflow enhancements.
5. Leverage Pre-labeling: Use existing speech recognition models to create initial labels, then have your team review and correct them. This can significantly speed up the process for clear, straightforward audio.
6. Segment Your Audio: Break long audio files into smaller chunks. Working with shorter segments makes it easier to maintain focus and accuracy.
7. Invest in Good Equipment: Provide your team with high-quality headphones and comfortable workstations. This will make a huge difference in their ability to hear and label accurately.
Real-World Impact
Let me share a quick case study to illustrate the impact of a well-designed audio labelling workflow. We were working with a telehealth company that needed to improve its automated transcription system for doctor-patient conversations.
Initially, their model needed help with medical terminology and often misinterpreted symptoms described by patients. We implemented a specialized workflow that included the following:
– A custom medical dictionary integrated into our labelling tool
– A team of labellers with backgrounds in healthcare
– A multi-stage review process focusing on the accuracy of medical terms
The result? After retraining their model with our newly labelled data, the company saw a 30% reduction in transcription errors. This not only improved the efficiency of their doctors but also reduced the risk of miscommunication in patient care.
Challenges You Might Face
It could be smoother sailing in the world of audio data labelling. Here are some challenges you might encounter and how to address them:
1. Handling Ambiguity: Sometimes, what’s being said in an audio clip needs to be clarified. We’ve found that having a protocol for marking uncertain labels and escalating complex cases for group review helps maintain consistency.
2. Dealing with Diverse Accents: If you’re working with global data, you’ll likely encounter a wide range of accents. Building a diverse team of labellers and providing extensive training on different accents can help.
3. Managing Large-Scale Projects: Keeping track of progress and maintaining quality can become challenging as your projects grow. Investing in project management tools and establishing clear communication channels is crucial.
4. Balancing Speed and Accuracy: There’s always pressure to label data quickly, but rushing leads to errors. Set realistic targets and emphasize the importance of accuracy over speed.
The Future of Audio Data Labeling
Exciting developments are on the horizon. Machine learning is increasingly used to assist in labelling, potentially revolutionizing how we approach this task.
For instance, at this very moment at SmartOne AI, we’re experimenting with cutting-edge models that can automatically detect speaker changes or identify non-speech sounds. This allows human labellers to focus on the more nuanced aspects of transcription.
However, I believe human expertise will remain crucial in audio data labelling for the foreseeable future, especially for complex or specialized domains. The key will be finding the right balance between automated assistance and human judgment.
Wrapping Up
We’re all adults here, so let’s be honest with each other: Setting up a practical audio data labelling workflow isn’t a one-size-fits-all process. It requires careful planning, the right tools, and a commitment to continuous improvement. But get it right, and you’ll be amazed at the difference it makes in the quality of your speech recognition models.
Remember, every perfectly transcribed conversation, every accurately understood command, starts with high-quality labelled data. Whether you need Data Labelling or Data Annotation Services for your organization’s next project, check out these industry-leading services we provide at SmartOne AI. With a reliable partner like us, you won’t regret it, as investing time and effort together into your labelling workflow lays the foundation for awe-inspiring speech recognition technology.
So, if you are truly serious about improving your audio data labelling, start by assessing your current process, identifying areas for improvement, and implementing some of the strategies we’ve discussed. Your future self (and your users) will thank you. Please feel free to reach out to us at any time or share your story via our comment section below so we, the community, can learn from each other. 🙂 Until next week, happy labelling!
Recent articles

Generative AI summit 2024
Generative AI summit 2024

Client Case Study: Automated Accounting for Intelligent Processing
Client Case Study: Automated Accounting for Intelligent Processing

Client Case Study: AI Logistics Control
Client Case Study: AI Logistics Control

Client Case Study: Inquiry Filter for a CRM Platform
Client Case Study: Inquiry Filter for a CRM Platform

Client Case Study: Product Classification
Client Case Study: Product Classification
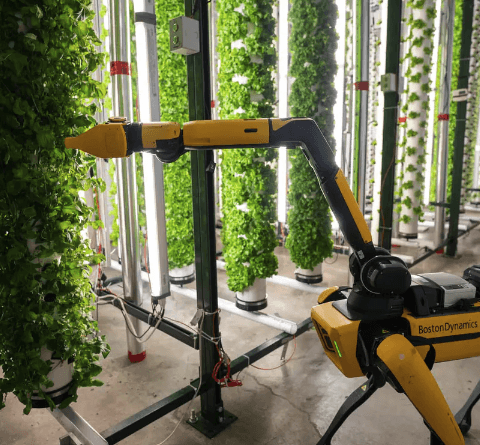
Client Case Study: Interius Farms Revolutionizing Vertical Farming with AI and Robotics
Client Case Study: Interius Farms Revolutionizing Vertical Farming with AI and Robotics

Client Case Study: Virtual Apparels Try-On
Client Case Study: Virtual Apparels Try-On

Client Case Study: SURGAR Delivering Augmented Reality for Laparoscopic Surgery
Client Case Study: SURGAR Delivering Augmented Reality for Laparoscopic Surgery

Client Case Study: Drone Intelligent Management
Client Case Study: Drone Intelligent Management

Client Case Study: Query-item matching for database management
Client Case Study: Query-item matching for database management