
How to Annotate Video Data: A Step-by-Step Guide for AI Training
May 16, 2024

Today, I’m super excited to share with you our comprehensive, step-by-step guide on how to annotate video data. This guide turns what might seem like a formidable task into an approachable and genuinely rewarding endeavour, enriching both your understanding and your projects in artificial intelligence. So, without further ado, let’s jump right into it.
Understanding Video Data Annotation
Let’s start by understanding what video data annotation involves. Annotation is the process of labelling the content of a video to make it understandable for AI models. This can include anything from identifying objects, actions, events, or environmental settings to more complex interpretations like emotional states or interactions. But why is this important? Because the accuracy of your annotations directly influences how well your AI model learns and performs.
Step 1: Define Your Objectives
At the outset, defining the objective of your AI model is paramount. This foundational step isn’t just about the broad strokes—like deciding whether to build a model for security purposes or sports analysis—it’s about specificity and alignment with your end goals. What do you need your AI to understand from the video data? This might mean discerning subtle facial expressions for a customer service bot, detecting anomalies in manufacturing line footage, or recognizing specific wildlife behaviours in conservation studies.
Consider, for instance, if you’re developing a security system. Here, your primary aim could be to detect unusual behaviours or unauthorized entries in real-time. Each video frame might need to be annotated to recognize not only people and objects but also movements that deviate from the norm, such as loitering near a door or rushing through a hallway. Frame-by-frame labelling becomes crucial because the system needs to evaluate each moment for potential security breaches.
On the other hand, your annotations will differ for a sports analysis tool that identifies and classifies different moves. Here, you might focus on periodic sampling, where you annotate keyframes that capture the peak of a movement, like a football kick or a basketball jump shot. This approach reduces the workload and can be effective in sports where moments of interest are distinct and well-defined.
Your objectives also guide how detailed your annotations need to be. For high-stakes applications like autonomous driving, where mistakes can be life-threatening, extremely detailed annotations that include all potential variables—such as pedestrians, traffic signs, other vehicles, and road conditions—are essential. In contrast, an AI designed to track workout routines might require less granular data, focusing instead on body positions and movements.
By clearly defining these objectives, you not only ensure that your annotations serve their intended purpose but also enhance the efficiency and effectiveness of your model training. This initial clarity in defining what exactly your AI model needs to understand and react to sets the stage for all subsequent steps in the video data annotation process.
Step 2: Choose the Right Tools
With your objectives clear, it’s time to choose your tools. Video annotation tools are vast and varied, ranging from basic to highly advanced options. Choosing the right tool can drastically impact both the efficiency of your annotation process and the quality of your AI model’s training data.
For starters, consider the complexity of your project. Suppose you’re working on a relatively straightforward task, such as annotating video for object recognition in a controlled environment. In that case, open-source platforms like CVAT (Computer Vision Annotation Tool) might be perfectly adequate. If you’re unfamiliar with CVAT, be sure to check out our Computer Vision Annotation Tool (CVAT): An In-Depth Guide. These tools are not only cost-effective but also customizable to a certain extent, allowing you to tailor them to your specific needs without a hefty price tag.
However, for more complex projects that involve multiple annotation layers or require high precision and reliability, you might need to look into more sophisticated commercial software. These tools offer advanced features that can significantly enhance productivity. Features such as automated tracking, where the software automatically recognizes and follows objects across frames, drastically reduce the amount of manual work required. This is especially useful in dynamic environments where objects or conditions change rapidly, such as in traffic scenes for autonomous vehicle training.
Object recognition capabilities are another advanced feature to consider. These tools can pre-identify everyday objects in video frames, which annotators can confirm or adjust, streamlining the initial annotation stages. Integration capabilities are also crucial for ensuring that your annotation tools can seamlessly connect with other software systems, like data management platforms or directly with your AI training modules, facilitating a smooth workflow from data annotation to model training.
It’s also wise to consider the tool’s user interface and usability. A well-designed, intuitive interface can significantly reduce annotator training time and minimize errors in the annotation process. Moreover, consider the tool’s scalability. As your project grows, you’ll need a tool that can handle an increasing volume of data without performance lags.
Finally, support and community can be a deciding factor. A tool backed by a strong community or professional support can ease the resolution of technical issues and provide valuable insights through shared experiences with other users.
The right annotation tool is not just about having a range of features; it’s about ensuring those features are aligned with your specific needs, enhancing both the annotation process and the eventual outcomes for your AI models. By thoroughly assessing your project’s requirements and the capabilities of potential tools, you can choose a solution that optimizes your workflow and supports high-quality data annotation.
Step 3: Establish Annotation Guidelines
Establishing clear and consistent annotation guidelines is an essential step that precedes the hands-on work of marking up video data. This preparatory stage is all about ensuring uniformity and precision across the board, irrespective of who is doing the annotating—be it you, in-house team members, or external annotators. Comprehensive guidelines serve as a roadmap that guides the entire annotation process, leading to more accurate and reliable data for training your AI model.
Defining Labels Clearly
Start by defining each label you will use in the annotation process. What exactly should “vehicle” or “pedestrian” denote in the context of your project? Should “vehicles” include bicycles and tractors or just cars and trucks? Being explicit about these definitions helps avoid confusion and ensures the data is annotated consistently.
Addressing Ambiguity
Ambiguity is inevitable in any data annotation project. You will encounter scenarios where it’s unclear how to label particular elements, such as partially obscured objects or actions that occur between frames. Your guidelines should include clear instructions on how to handle these ambiguous cases. Decide whether to label conservatively (only label what is clearly visible) or more inclusively (label based on inference from context). Including examples of ambiguous cases and how to annotate them can be particularly helpful.
Setting Detail Levels
The level of detail required in annotations can vary significantly depending on the purpose of your AI model. For instance, if the model needs to detect objects at a distance, specify how small an object can be in the frame while still requiring annotation. Conversely, details about object interactions might be necessary for close-up interaction analysis. Define how detailed annotations need to be for different objects and scenarios, such as whether to mark only the outline of a person or include detailed posture and limb positions.
Consistency Across Annotators
Include a section on standardizing the annotation process to ensure consistency, especially when working with a team or outsourcing. This might involve regular calibration sessions where annotators compare their work against each other to identify discrepancies or periodic reviews of annotated data by a supervisor to ensure guidelines are being followed accurately.
Regular Updates and Feedback
Annotation guidelines should not be static; they need to evolve as you learn more from the ongoing annotation process and as your AI model’s needs change. Incorporate a system for feedback where annotators can highlight unclear areas in the guidelines or suggest improvements based on their practical experiences. Regular policy updates based on this feedback can help refine the annotation process and improve the overall quality of your training data.
By establishing detailed, clear, and dynamic annotation guidelines, you lay a strong foundation for the accuracy and reliability of your AI model’s training data. This preparatory work not only enhances the efficiency of the annotation process but also significantly impacts the performance of your final AI application.
Step 4: Begin the Annotation Process
With the groundwork laid through clear objectives, appropriate tools, and solid guidelines, it’s now time to dive into the heart of the project—annotating the video data. This phase is where your preparation meets action and where your work’s precision directly influences your AI model’s performance.
Understanding the Tools and Techniques
Firstly, ensure you are thoroughly familiar with your chosen annotation tools. At SmartOne.ai we are technology agnostic and work with a wide range of data platform providers including: BasicAI, CVAT, Dataloop, Encord, Kili Technologies, Labelbox, V7 Labs and more. take the time to understand all the functionalities at your disposal. Depending on the complexity of the video data and the specific requirements of your project, you might employ a variety of annotation techniques:
Bounding Boxes: Simple yet effective, bounding boxes involve drawing rectangles around objects of interest in each frame. They are typically used for object detection tasks. Want to learn more about bounding boxes? Be sure to check out Bounding Boxes Explained: Enhancing Object Detection
Polygons: When objects are irregularly shaped or when precision is paramount, polygons allow for a more detailed outline around the object, capturing nuances that bounding boxes cannot.
Tagging Temporal Segments: For actions or events, tagging temporal segments involves marking the start and end of an event within the video timeline. This is particularly useful in behaviour analysis or event detection.
Tackling the Annotation
As you start annotating, it’s essential to be meticulous. Each frame of a video can provide valuable information, and your task is to interpret this visual data accurately. This involves:
Frame-by-Frame Analysis: Look at each frame closely to ensure that no critical details are missed. This is crucial for dynamic scenes where actions or object positions change rapidly.
Handling Ambiguities: Refer back to your guidelines on how to handle ambiguous situations. If an object is only partially visible, decide whether and how it should be annotated based on the rules you’ve established.
Maintaining Consistency: Keep your annotations consistent across the entire dataset. This consistency is vital for effectively training AI models, as it ensures the model learns from clear, unambiguous examples.
Iterative Process and Patience
Remember, video annotation is an iterative and sometimes repetitive process. Patience is indeed a virtue here. The more detailed and precise your annotations are, the more accurately the AI model can learn from them. It’s a process that might seem slow at times, but every frame you annotate is a step towards creating a more intelligent AI system.
Review Regularly: Periodically step back and review the annotated video clips to ensure consistency and accuracy throughout. This can also help identify any misunderstandings or misinterpretations early on.
Collaborative Annotation: If working in a team, regularly sync with your colleagues to compare notes and resolve any discrepancies. This collaboration can help refine the annotation process and improve the quality of your dataset.
Embrace the Process
Embarking on the video annotation process is both challenging and enriching. Each video clip you annotate not only contributes to the dataset but also enhances your understanding of how AI models perceive and interpret the world. Embrace this journey with diligence and enthusiasm, as the skills you develop here are critical for the burgeoning field of artificial intelligence.
By being thorough and patient throughout this process, you help ensure that the AI model you are training will perform reliably and effectively in real-world applications.
Step 5: Quality Control
Quality control is an indispensable part of the video data annotation process. After the meticulous effort of annotating, it’s crucial to ensure that the data is accurate and consistent. Even the most skilled annotators can make errors, and in AI training, even minor inaccuracies can lead to significant deviations in the behaviour of the final model. A robust quality control process will help catch these errors before impacting the model’s performance.
Conducting Thorough Reviews
The first step in quality control is to review the annotated data thoroughly. This can be done in several ways:
Self-review: Immediately after annotating, take a moment to review your own work. This immediate review can help catch obvious errors while the task is still fresh in your mind.
Peer Review: Having a colleague review your annotations is incredibly valuable. A fresh set of eyes may catch errors that you overlooked. Peer reviews can also help ensure that all annotators consistently understand and apply the annotation guidelines.
Random Sampling: It’s often impractical to review every single frame of annotated video, especially in large datasets. Instead, review random samples of the annotations. This statistical sampling method can provide a reasonable estimate of the overall quality of the annotation project without the need for exhaustive checks.
Leveraging Automated Tools
In addition to manual reviews, consider using automated tools to aid in quality control. Many annotation platforms come with tools that can automatically flag anomalies in annotations, such as overlapping labels, labels that significantly deviate from established norms, or sequences that lack consistency. These tools can provide a first pass at quality control, highlighting areas that require human review.
Refining Guidelines
Quality control is also an excellent opportunity to refine your annotation guidelines. If specific errors are recurrent, it may indicate that parts of your guidelines are unclear or insufficient for the annotators’ needs. Use the insights gained from quality control checks to update and clarify your guidelines, which in turn will help improve the accuracy of future annotations.
Regular Quality Audits
Implement regular quality audits throughout the annotation process. This means setting aside specific times to focus solely on checking the quality of the annotations. These audits can help maintain high standards throughout the duration of the project and are particularly important in long-term projects where drift (gradual deviation from the intended annotation standards) might occur.
Feedback Loop
Create a feedback loop where annotators are informed of the mistakes identified during quality checks. This educational feedback helps annotators learn from their errors, improving their performance over time and enhancing the overall quality of the annotations.
Continuous Improvement
Finally, quality control should be seen as an ongoing process. As the project progresses, continue to monitor the effectiveness of your quality control methods and make adjustments as necessary. The goal is to continually enhance the precision and reliability of your annotations, ensuring that your AI models are trained on high-quality data that leads to robust performance in real-world applications.
Step 6: Train Your Model
With the meticulous task of video data annotation complete and all of your quality checks in place, it’s now time to see your efforts bear fruit as you move into the crucial phase of training your AI model. This step is where the theoretical meets the practical, where data transforms into actionable intelligence.
Feeding Data into Your AI System
Begin by feeding the annotated video data into your AI system. This involves uploading the data and ensuring it’s formatted correctly for the model to process. Data preprocessing is crucial here—it involves normalizing inputs, handling missing data, and potentially augmenting the data set to improve the model’s ability to generalize from the training data to real-world scenarios.
Starting the Training Process
Once your data is ready, initiate the training process. This typically involves setting initial parameters, choosing a learning rate, and selecting the appropriate algorithms and neural network architectures. For video data, convolutional neural networks (CNNs) and recurrent neural networks (RNNs) are often used due to their ability to analyze visual and sequential data, respectively.
Monitoring Model Performance
As the model trains, continuously monitor its performance. This involves evaluating the model on a validation set—a portion of the data not used in training—to ensure that it’s learning correctly and not just memorizing the input data (a problem known as overfitting). Keep an eye on metrics such as accuracy, precision, recall, and the F1 score, which will tell you how well the model performs according to your specific objectives.
Tweaking Parameters
You may need to tweak the model’s parameters based on the performance insights. Adjustments might include changing the learning rate, modifying the network architecture, or employing dropout or batch normalization techniques to improve training outcomes. Parameter tuning is often iterative, requiring several rounds of adjustments to find the optimal settings for the best model performance.
Revisiting Annotations
Sometimes, despite all efforts, the model may not perform as expected. This could indicate issues with the input data itself. Revisit your annotations to ensure they are accurate and consistent. Look for patterns in misclassifications or model output errors to identify if specific data types are causing issues. It might be necessary to enhance the dataset with additional annotations or corrections.
Continuous Learning and Validation
Training a model is rarely a one-off task, especially in AI systems designed to operate in dynamic environments or those that will continue to encounter new data after deployment. Implement continuous learning mechanisms so the model can learn and adapt from new data over time. Additionally, a robust validation process will be set up to periodically assess the model with fresh data, ensuring it remains accurate and relevant.
Deployment and Real-World Testing
Once satisfied with the model’s performance, move towards deployment. However, real-world testing should be conducted before full-scale implementation to see how the model performs outside the controlled training environment. This will likely provide insights into additional adjustments needed to ensure the model is truly ready for deployment.
Training your AI model is a dynamic and ongoing process that requires attention to detail, a deep understanding of your data and objectives, and a willingness to adapt and refine your approach as new information becomes available. By methodically following these steps and continuously iterating on your model, you set the stage for developing a robust, effective AI system that can significantly impact your intended application area.
Summing It All Up
Video data annotation can be tedious and time-consuming. Still, it’s also a gateway to developing powerful AI applications that can see, understand, and interact with the world in human-like ways. As you embark on this process, remember that every minute spent refining your annotations is building a foundation for a more intelligent, more reliable AI.
AI is as much about innovation and cutting-edge technology as it is about understanding and patience. Each video you annotate helps teach AI a little more about our world. So, grab your tools and start annotating—a universe of video data is waiting to be explored and understood. And if you ever feel overwhelmed, think about the incredible capabilities you’re helping to create.
Now that you know a little more about “How to Annotate Video Data”, we highly recommend checking out our popular post on How to Annotate Audio Data for Machine Learning Model Training next. If you find yourself in need of video annotation services, be sure to reach out to us; we’re always happy to continue the conversation.
Happy annotating!
Recent articles

Generative AI summit 2024
Generative AI summit 2024

Client Case Study: Automated Accounting for Intelligent Processing
Client Case Study: Automated Accounting for Intelligent Processing

Client Case Study: AI Logistics Control
Client Case Study: AI Logistics Control

Client Case Study: Inquiry Filter for a CRM Platform
Client Case Study: Inquiry Filter for a CRM Platform

Client Case Study: Product Classification
Client Case Study: Product Classification
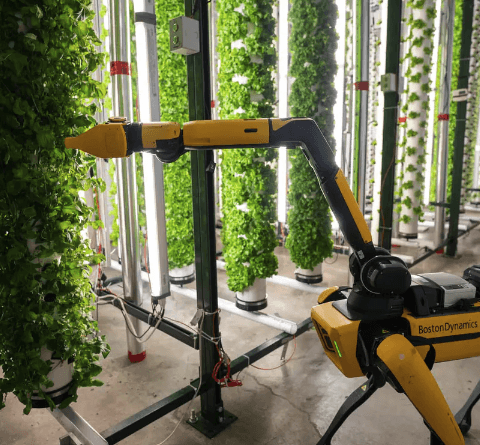
Client Case Study: Interius Farms Revolutionizing Vertical Farming with AI and Robotics
Client Case Study: Interius Farms Revolutionizing Vertical Farming with AI and Robotics

Client Case Study: Virtual Apparels Try-On
Client Case Study: Virtual Apparels Try-On

Client Case Study: SURGAR Delivering Augmented Reality for Laparoscopic Surgery
Client Case Study: SURGAR Delivering Augmented Reality for Laparoscopic Surgery

Client Case Study: Drone Intelligent Management
Client Case Study: Drone Intelligent Management

Client Case Study: Query-item matching for database management
Client Case Study: Query-item matching for database management